
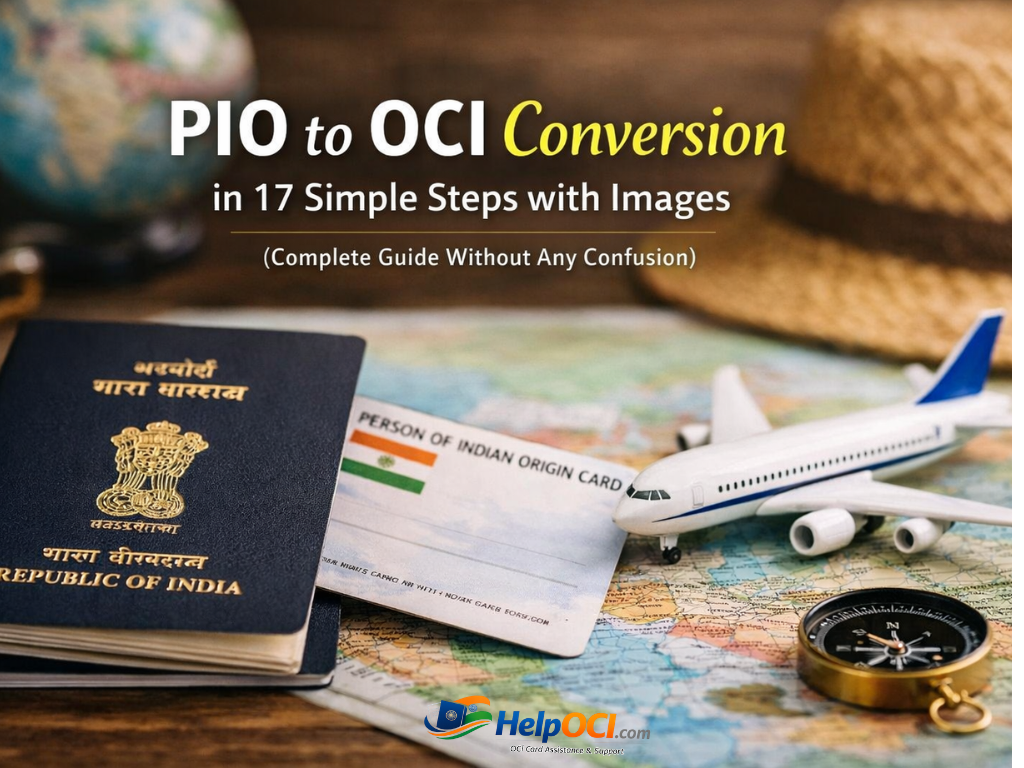
PIO to OCI Conversion:-The PIO card is now outdated and no longer in use. While the government formally merged the PIO scheme into the OCI scheme back in 2015, we still see people showing up with these handwritten booklets, creating real problems at check-in counters. The core issue now isn’t just about the PIO to OCI conversion; it’s about understanding the lifecycle of the OCI card itself, specifically the mandatory reissue rules that are catching many people off guard.
People are looking for this information because travel is back in full swing, and airline staff are getting stricter about documentation. We are going to detail the final steps for PIO conversion and, more importantly, the critical OCI timelines you must follow to ensure your travel is never disrupted.
PIO to OCI Conversion: The Final Steps
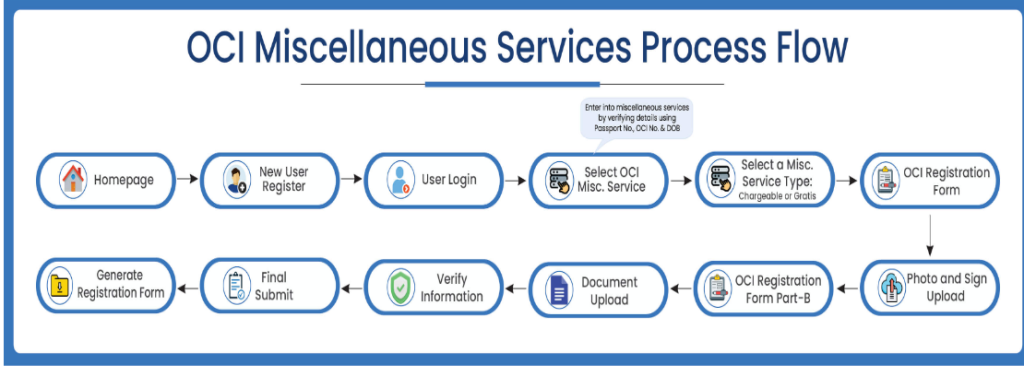
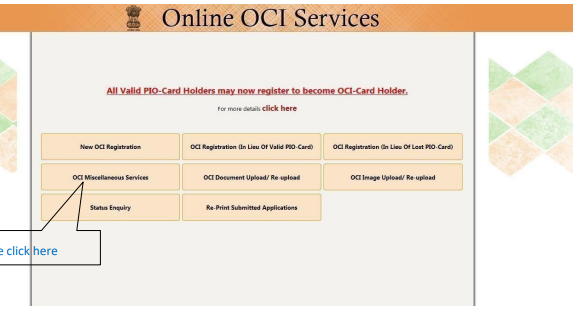
This is not a fresh application; it is a specific conversion process. You handle this through the OCI Miscellaneous Services online.
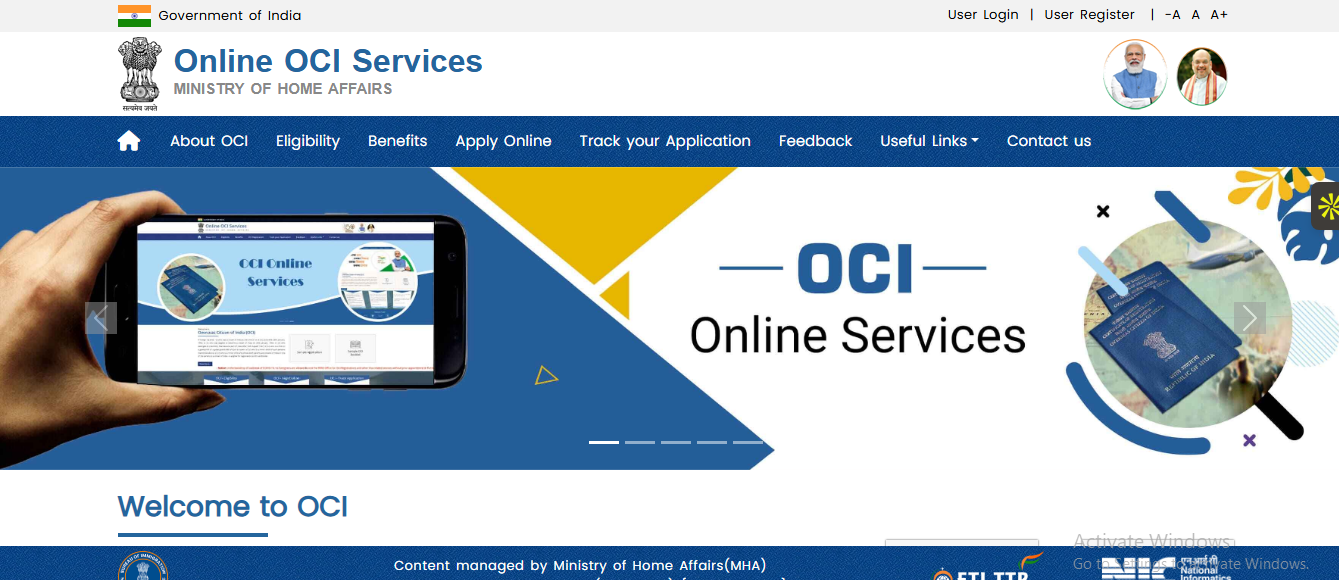
Step 1:- Navigate to the Government of India’s OCI portal.(Homepage).
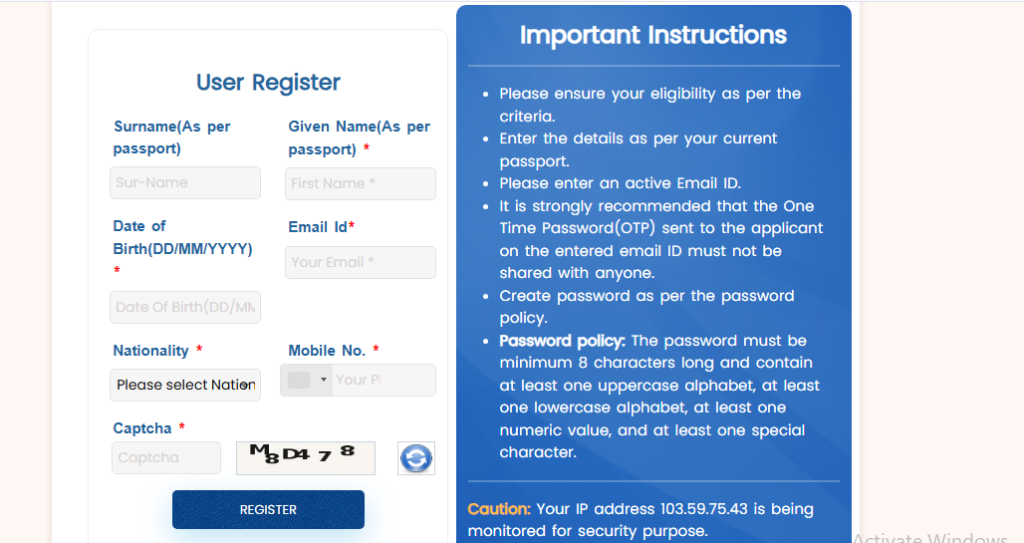
Step 2:-Click on New User Registration
- If you are a new user, create an account.
- You’ll need to enter basic details like email and password.
Step 3:-User Login
- Log in using your registered credentials.
- Existing users can skip registration and log in directly.
Step 4:-After logging in, choose “OCI Miscellaneous Services” from the available options.
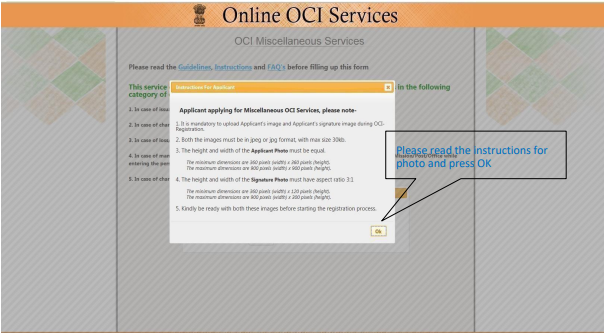
Step 5: Read detail carefully, click on OK.
Step 6:- Answer to the following question, this is type of captcha.

Step 7:-Start your OCI application by selecting “Fresh Application” or continue using your temporary number, then follow the on-screen instructions to proceed.

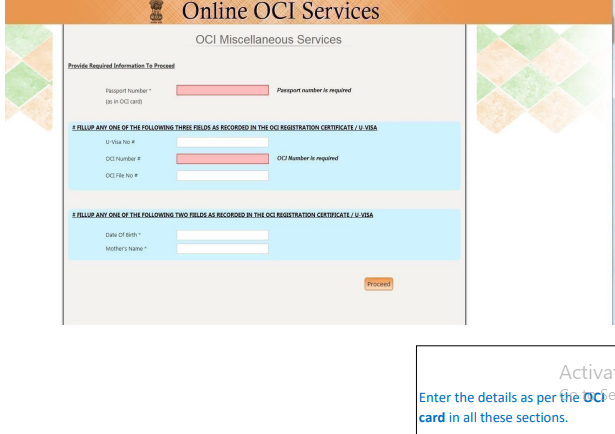
Step 8:-Enter your passport number and required OCI details exactly as per your OCI records, then click Proceed to continue.
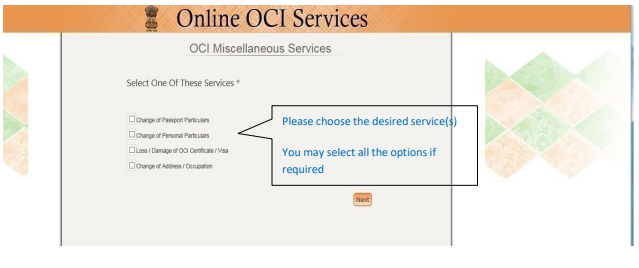
Step 9:-Select the required OCI miscellaneous service(s).
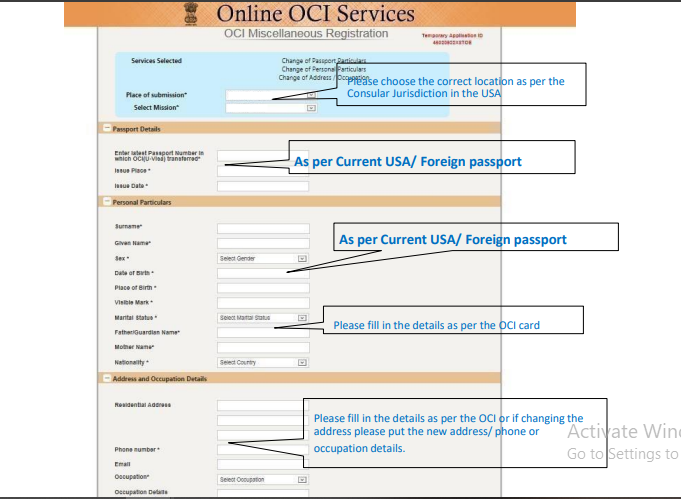
Step 10-Enter Your detail this include-
- Select the correct Place of Submission (Mission) as per your consular jurisdiction.
- Enter passport details exactly as per your current foreign passport.
- Fill personal details (name, DOB, gender) as per your current passport.
- Enter parent details as per your OCI card records.
- Provide your current address, phone, email, and occupation details.
- If updating address, enter the new address and contact details.
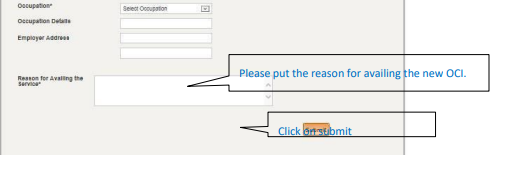
- Mention the reason for availing the OCI service clearly.
- Check Detail first and then submit
Step 11:- Attach your documents.

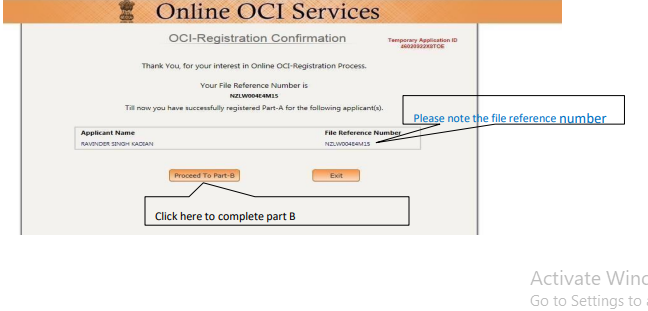
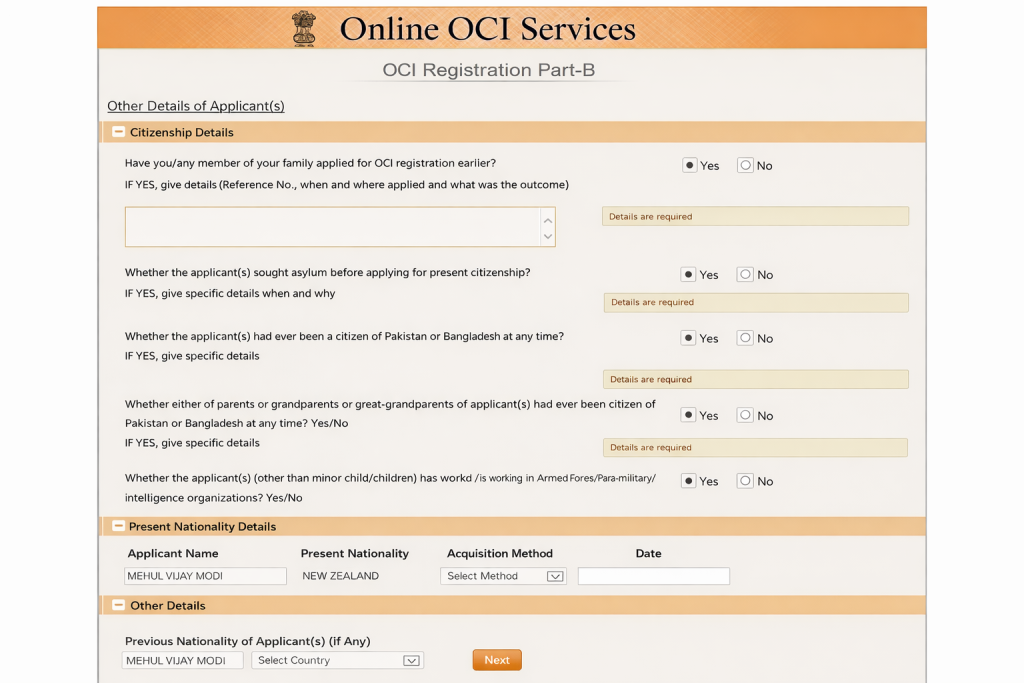
Step 12:-Now proceed to part B.
Step 13:- Fill details, it include-
- Answer all citizenship-related questions by selecting Yes/No as applicable.
- Provide details if any answer requires explanation.
- Fill in present nationality details as per your current citizenship.
- Enter previous nationality (if any) correctly.
- Complete all sections and proceed to the next step.
Step 14:-Submission Confirmation & Form Generation
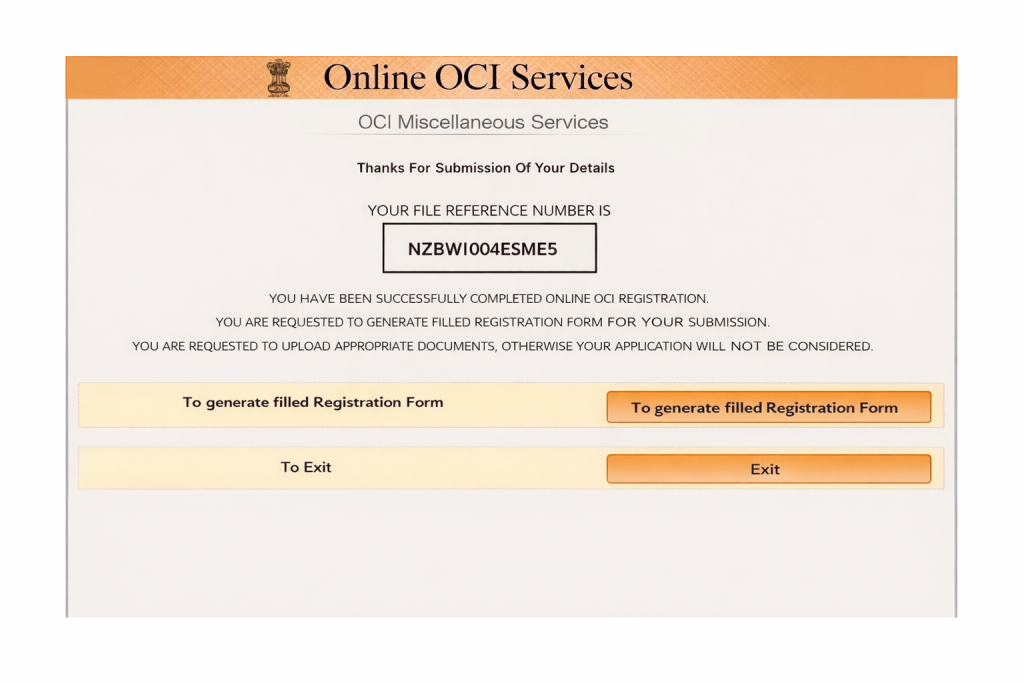
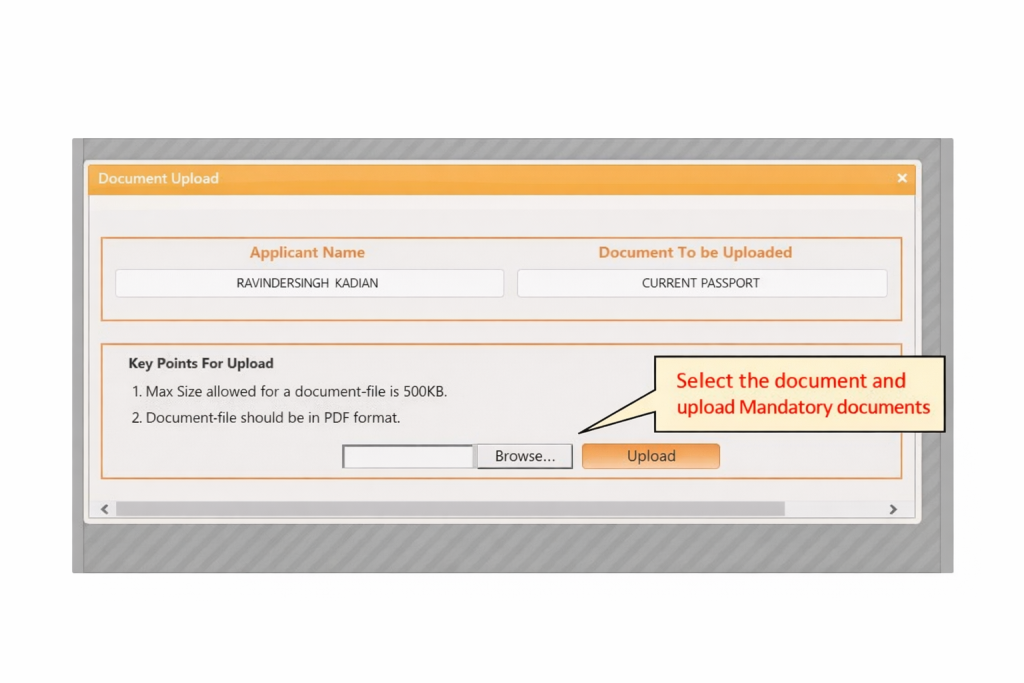
Step 15:-Upload Supporting Documents
Select the required document, upload it in PDF format, and ensure it meets the size limit before proceeding.
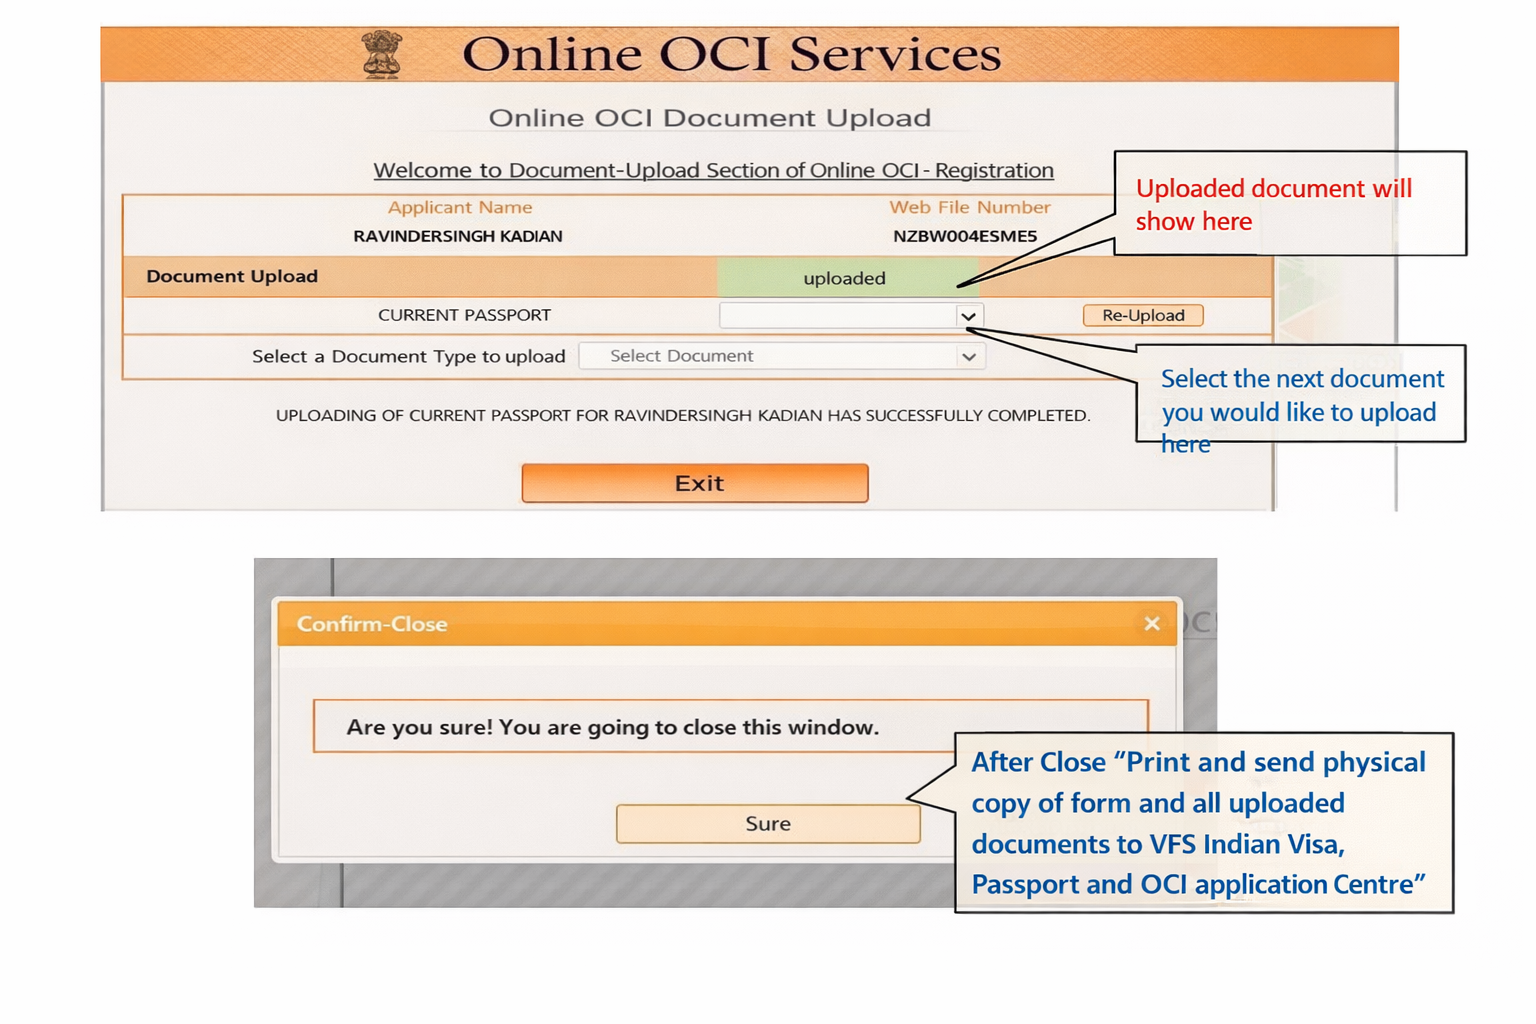
Step 16:–Verify Upload & Exit
- Check that your document is successfully uploaded.
- Upload remaining documents if required.
- Click Exit and confirm to close the application.
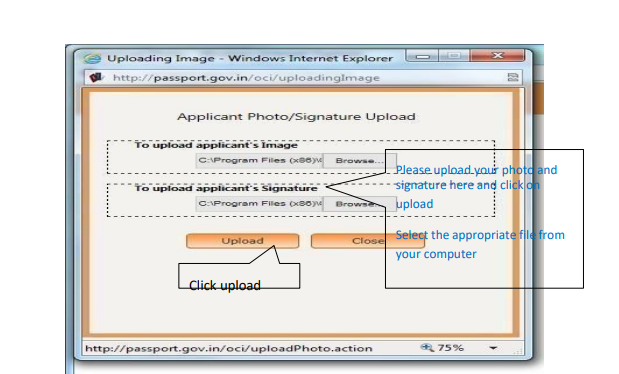
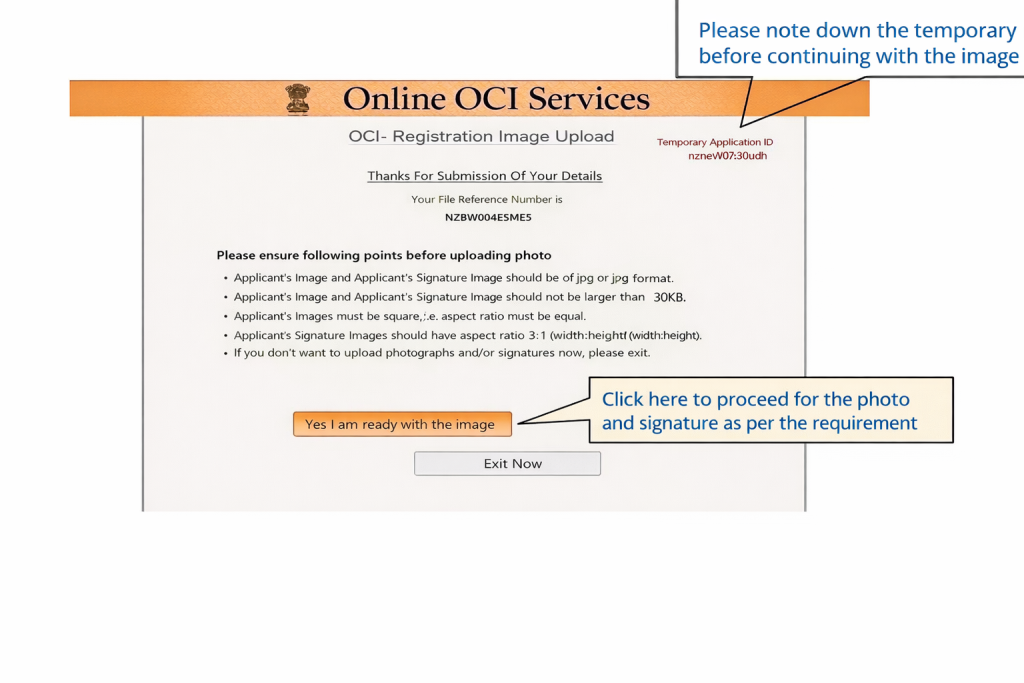
Step 17:–Upload Photo & Signature
- Note down your Temporary Application ID before proceeding.
- Click on “Yes I am ready with the image” to continue.
- Upload your photo and signature as per the required format.
The process explained above will help you successfully fill PIO to OCI Conversion. However, it can be time-consuming and requires careful attention to detail.
If you want to save time and avoid complications, the best option is to get expert assistance. We recommend contacting Visament, a trusted service provider for POI to OCI Conversion. Their team will handle the entire form-filling process for you — you simply need to provide your details.
👉 We’ve added the link below so you can get started stress-free.

Frequently Asked Questions
Q1: I got my OCI card at age 40 and a new passport at age 45. Do I need a reissue?
No. Any passport renewal between the ages of 21 and 49 does not require an OCI card reissue. You are compliant until you get a new passport issued after you turn 50.
Q2: Is the PIO-to-OCI conversion free?
It was free for a period, but that has ended. There is now a fee for the conversion service. The exact amount depends on your country of residence and the local currency, so check the website of the Indian mission or its service provider in your region.
Q3: My child is 19 and their passport is expiring next year after they turn 20. Should I reissue the OCI now or wait?
Wait. If you get a new passport and reissue the OCI before they turn 20, you'll just have to do it again when they get their next passport. It is better to wait until they are 21. Then, any passport they get won't require an OCI reissue until they pass the age of 50.