

PIO to OCI conversion
PIO to OCI Conversion: All Questions Answered (Process, Validity, Timeline & Rules)PIO to OCI Conversion: All Questions Answered (Process, Validity, Timeline & Rules)
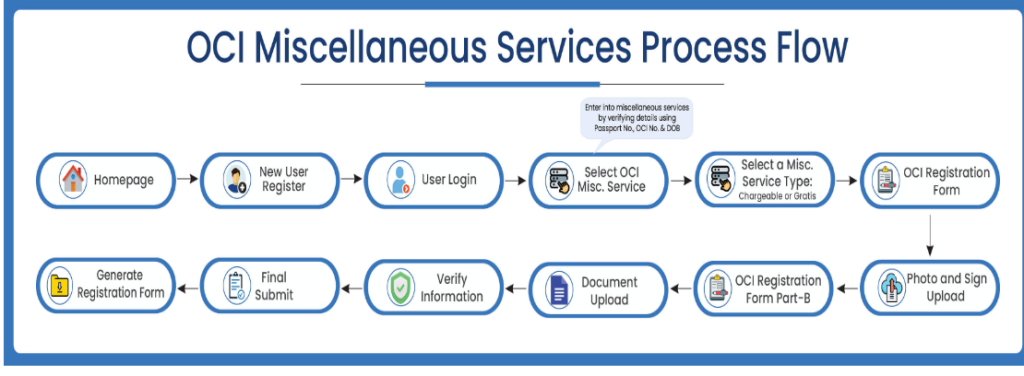 This is not a fresh application; it is a specific conversion process. You handle this through the OCI Miscellaneous Services online.
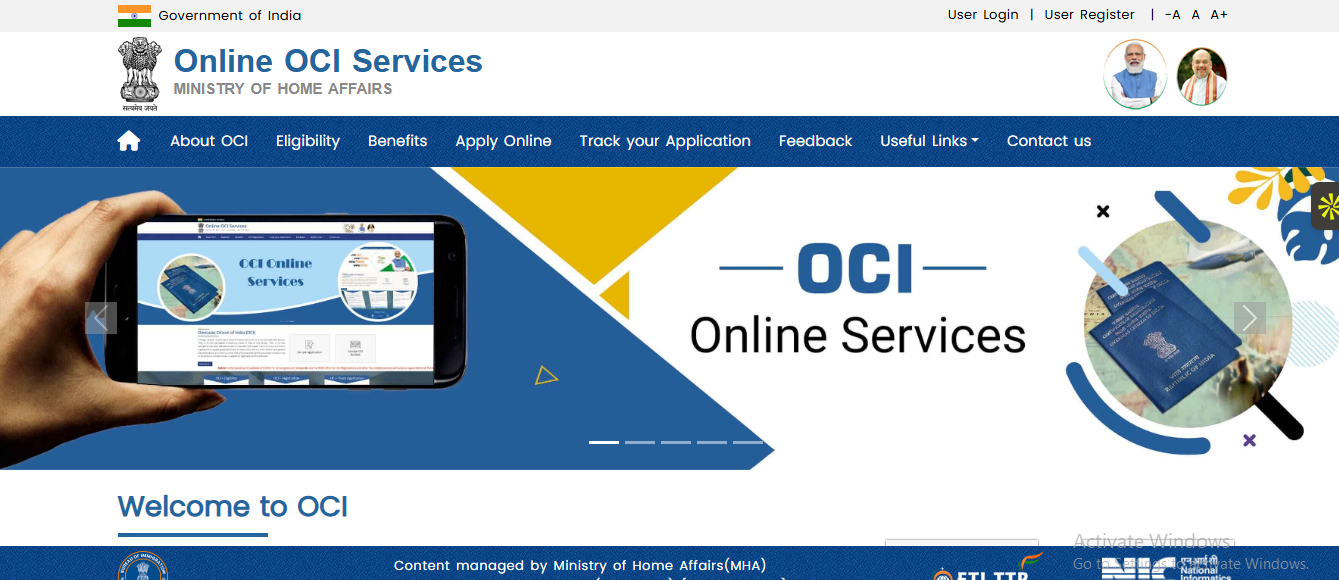
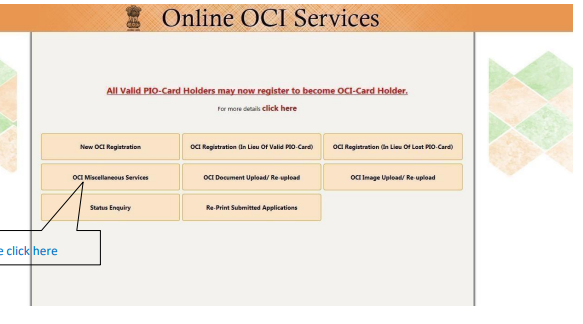
Step 1:- Navigate to the Government of India's OCI portal.(Homepage).
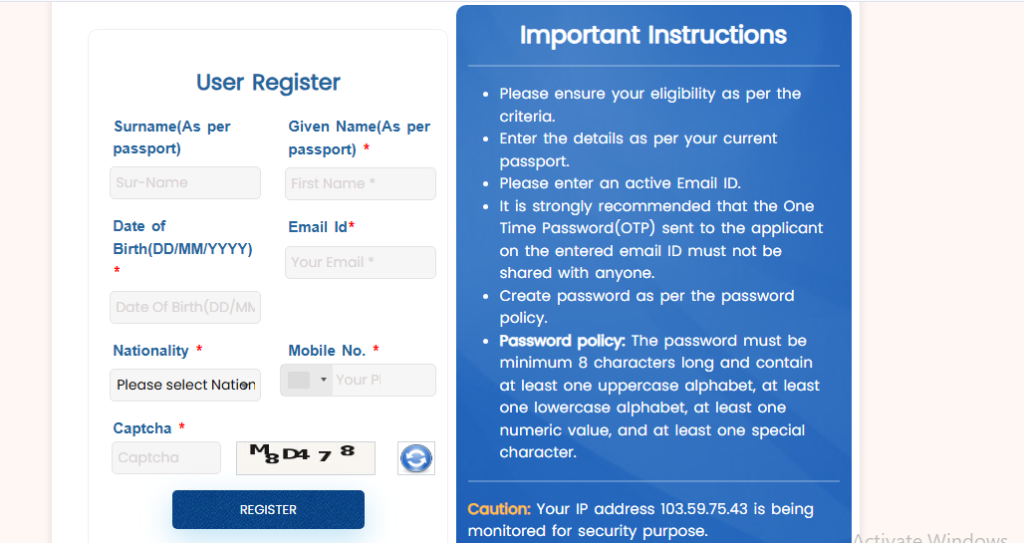
 Step 2:-Click on New User Registration
 Step 3:-User Login
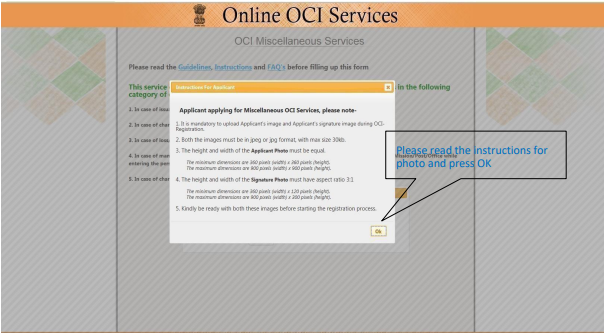
 Step 5: Read detail carefully, click on OK.
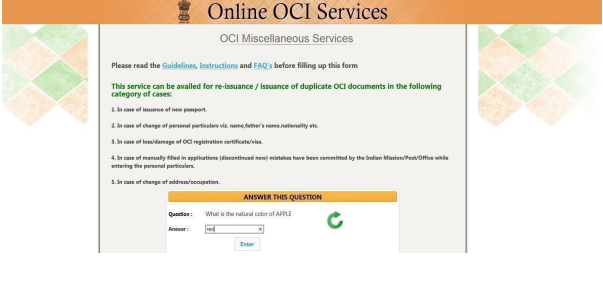
 Step 6:- Answer to the following question, this is type of captcha.
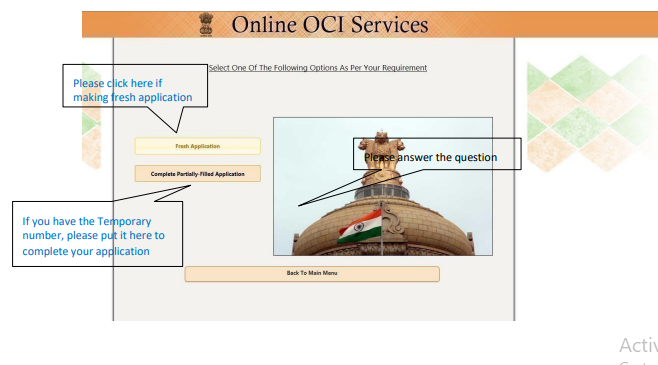
 Step 7:-Start your OCI application by selecting “Fresh Application” or continue using your temporary number, then follow the on-screen instructions to proceed.
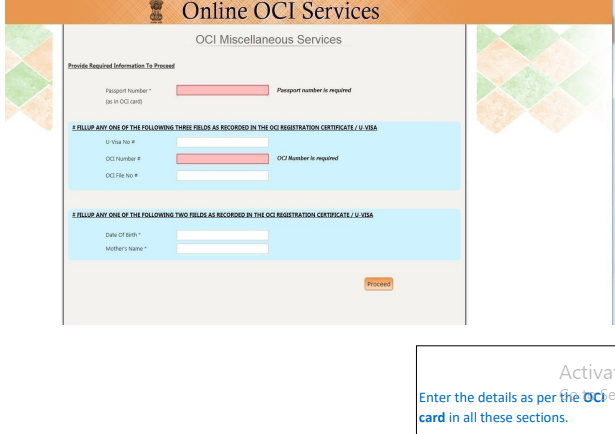
 Step 8:-Enter your passport number and required OCI details exactly as per your OCI records, then click Proceed to continue.
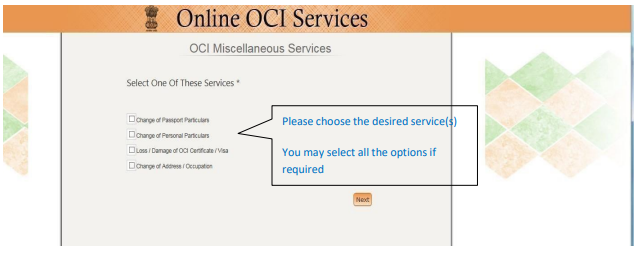
 Step 9:-Select the required OCI miscellaneous service(s).
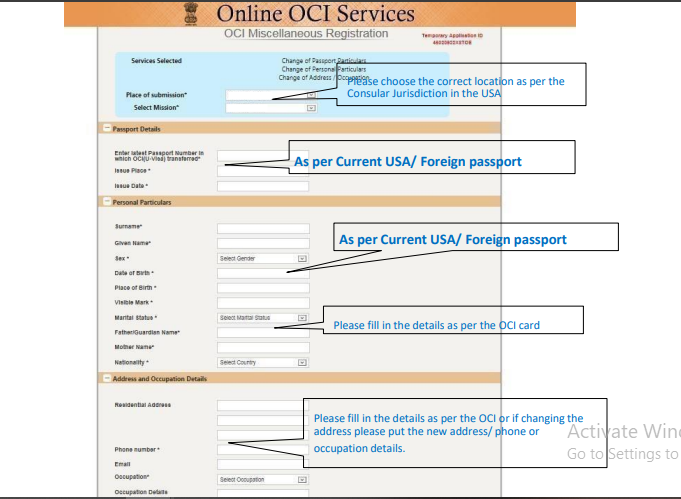
 Step 10-Enter Your detail this include-
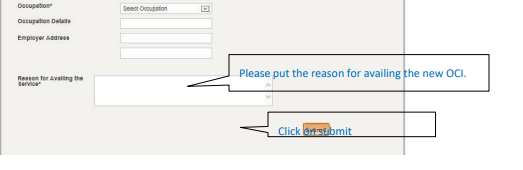 Step 11:- Attach your documents.
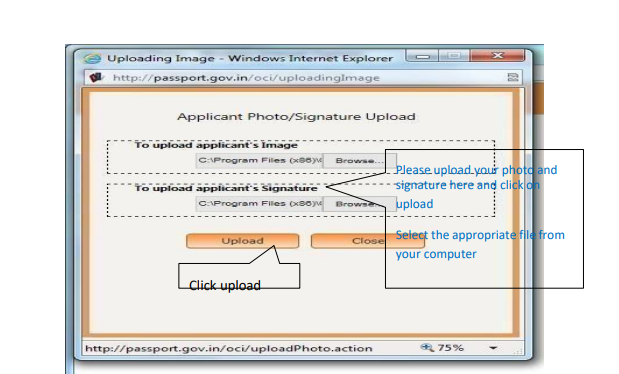
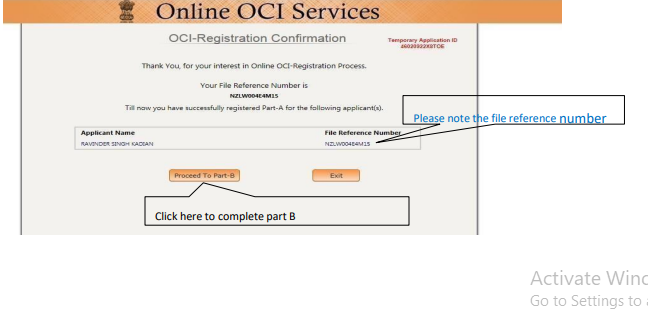
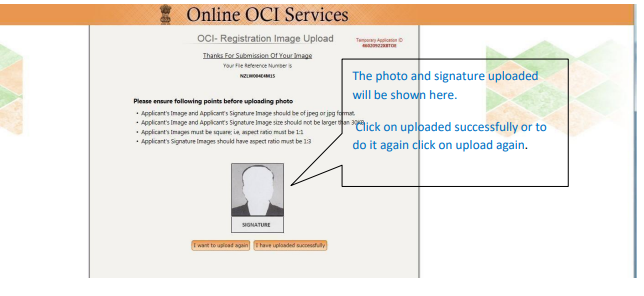 Step 12:-Now proceed to part B.
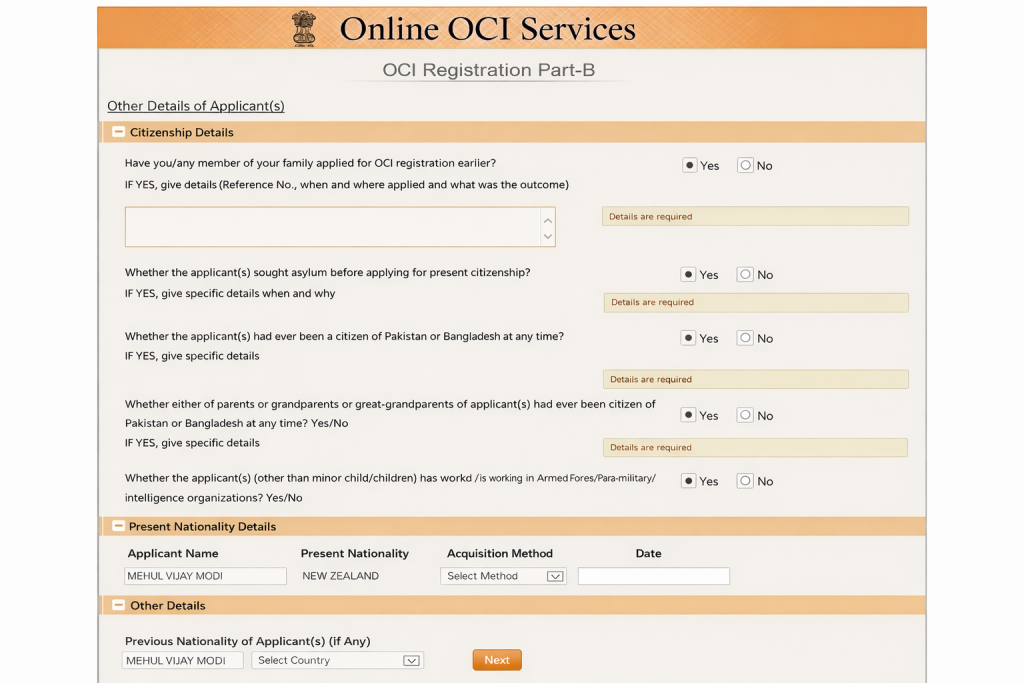
 Step 13:- Fill details, it include-
 Step 14:-Submission Confirmation & Form Generation
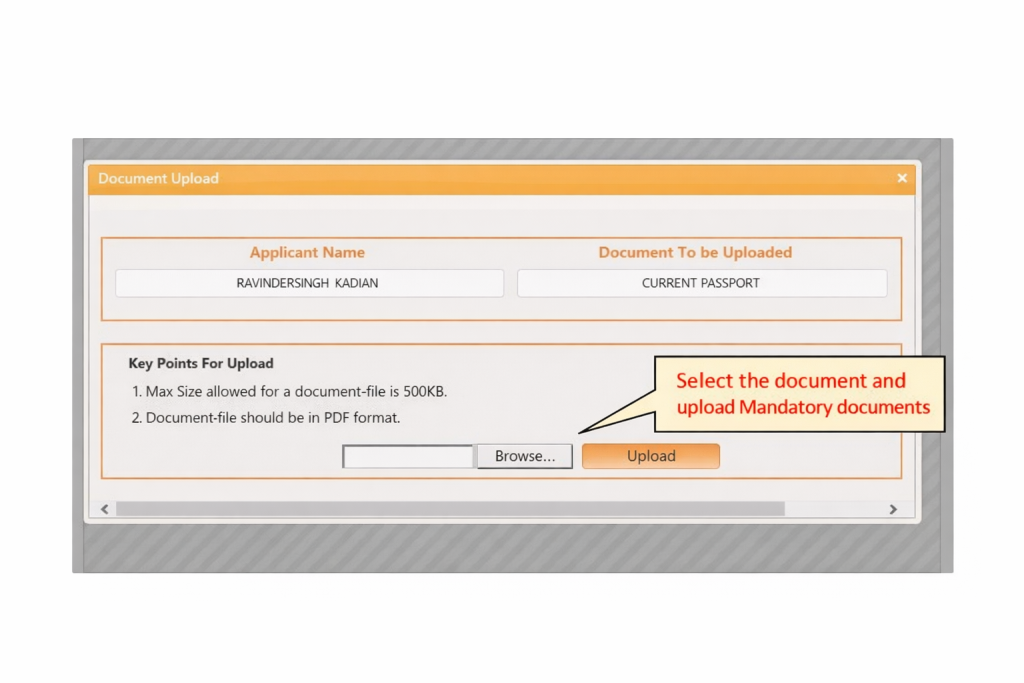
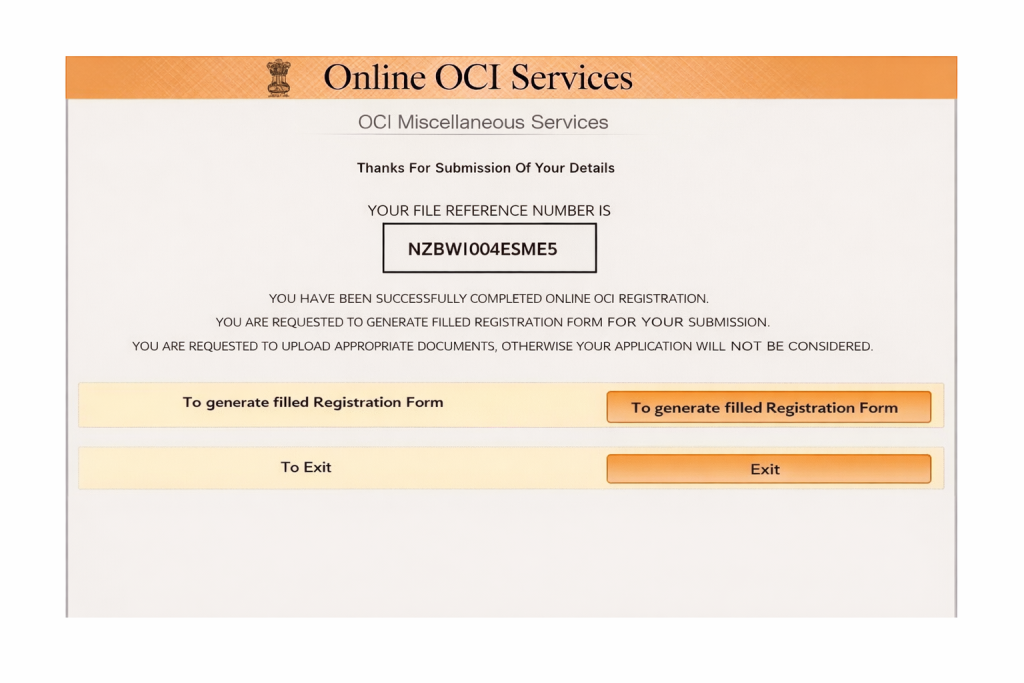 Step 15:-Upload Supporting Documents
Select the required document, upload it in PDF format, and ensure it meets the size limit before proceeding.
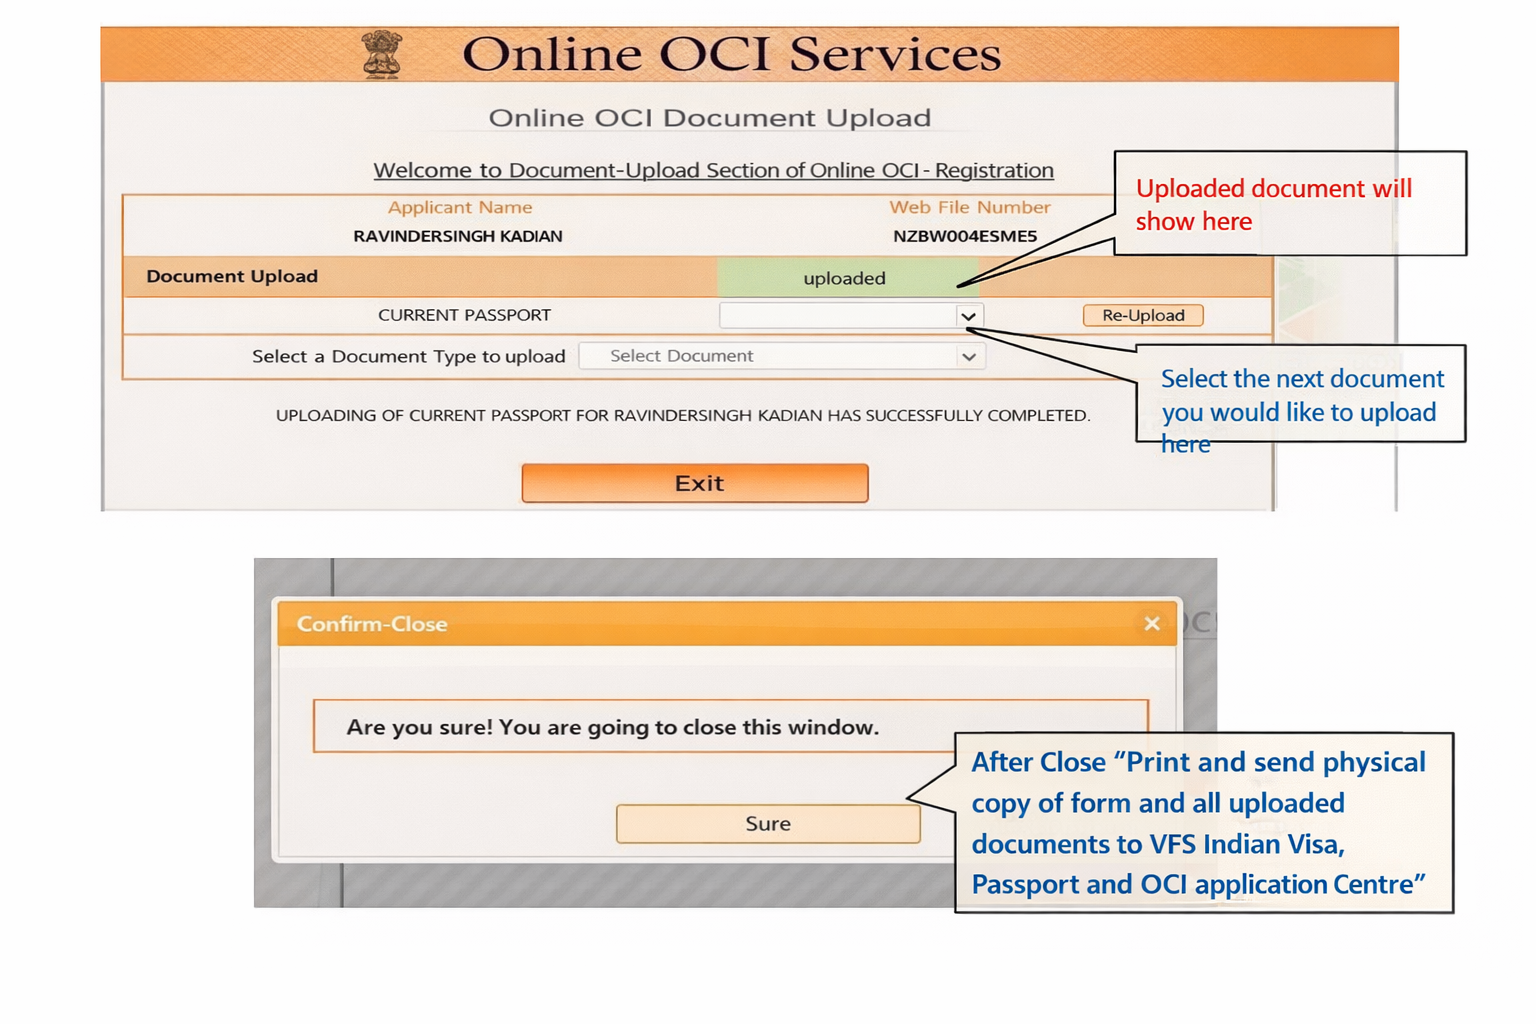
 Step 16:-Verify Upload & Exit
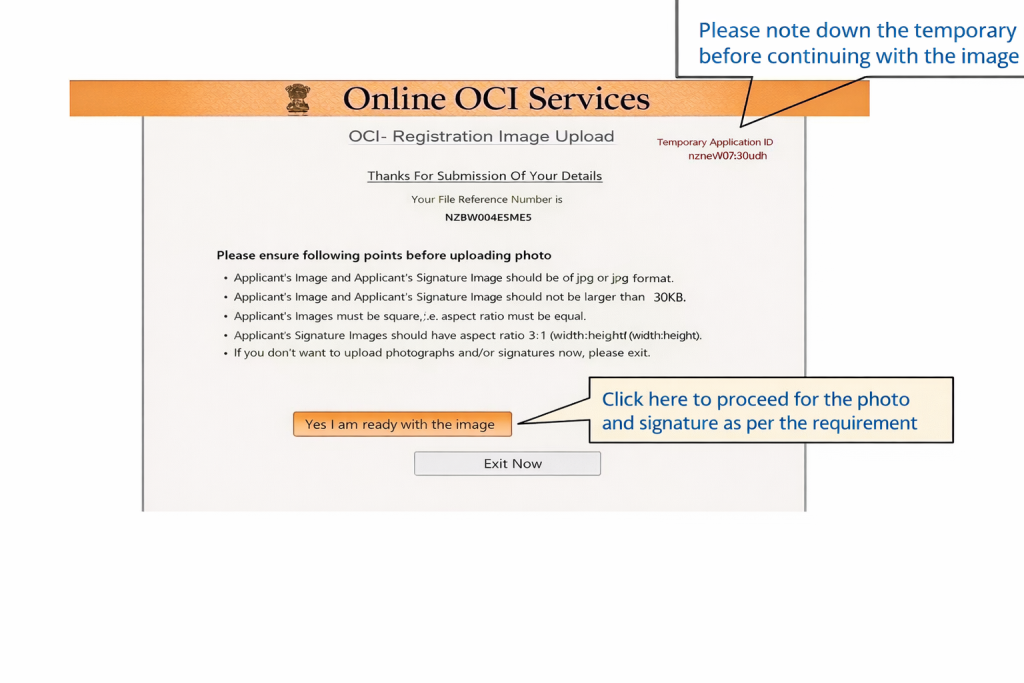
 Step 17:-Upload Photo & Signature
The process explained above will help you successfully fill PIO to OCI Conversion. However, it can be time-consuming and requires careful attention to detail.
If you want to save time and avoid complications, the best option is to get expert assistance. We recommend contacting Visament, a trusted service provider for POI to OCI Conversion. Their team will handle the entire form-filling process for you — you simply need to provide your details.
? We’ve added the link below so you can get started stress-free.

Note: This guide is for information purposes only. HelpOCI or the author will not be responsible for any direct or indirect loss incurred by the reader for taking any decision based on the information or the contents. It is advisable to consult a qualified professional for guidance based on your exact situation.
Get reliable support for every step, whether it's form filling or final submission.




Want to read more? Explore Blogs

Comments