
Minor OCI card Application
How to Renew an OCI Card for a Minor in UK (2026 Step-by-Step Guide)How to Renew an OCI Card for a Minor in UK (2026 Step-by-Step Guide)
Written by Anil

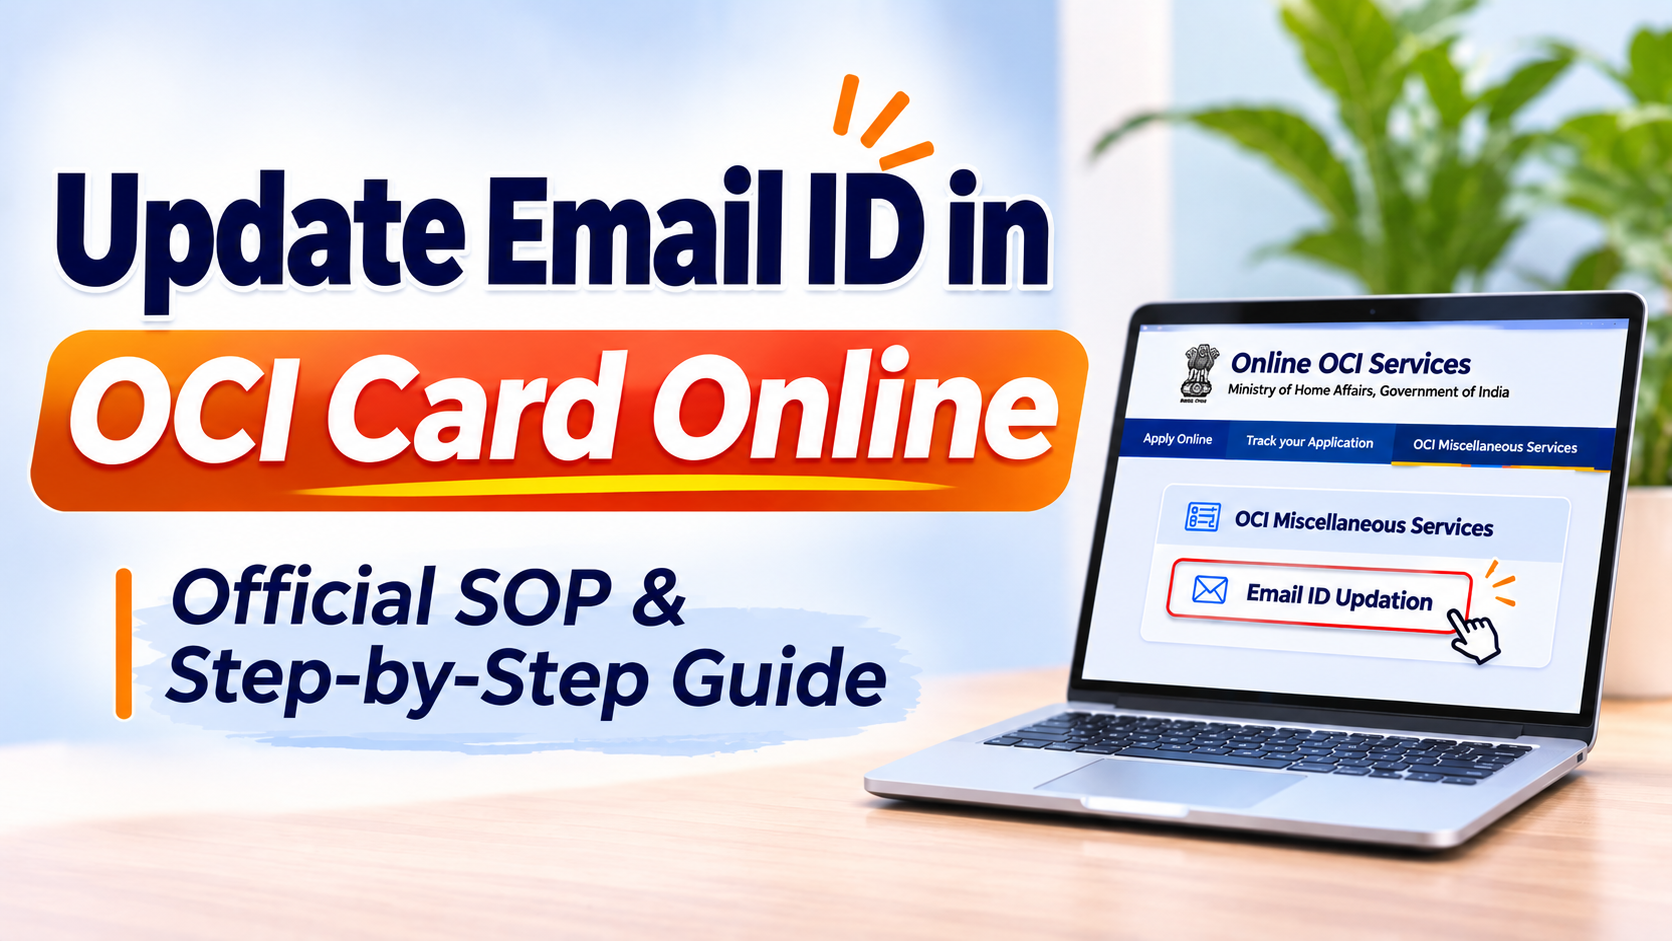
Your registered email ID is a very Important Digital Identity that helps you access and manage your Overseas Citizen of India (OCI) Card Services. It’s used to manage almost everything on the OCI portal whether you need to login for OCI services, and is mainly important for assessing your digital e-OCI Card. But what happens if you no longer have access to your registered email address, your old email account has been closed, or you want to use a different email ID? You can now submit an Email ID Updation application through the OCI Miscellaneous Services section of the official OCI portal.
The Ministry of Home Affairs has provided a dedicated Standard Operating Procedure (SOP) explaining the complete online process. In this guide, we will explain very simple steps to update your email ID in OCI Card online, the documents requirement, and the application submission process to help you update your registered email ID correctly and seamlessly.
Before starting the online application process, ensure you have the following details and documents ready:
Scanned Copy of OCI Card: Clear copy of your valid OCI card (main pages) for uploading.
OCI Card Number: Keep your OCI registration number available.
Current Passport Details: Valid foreign passport number and details linked with your OCI.
Date of Birth: Provide your date of birth as recorded in your OCI details.
New Active Email Address: Keep the new email address you want to register ready. You should be able to access this email account.
Reason for Email Update: Be prepared to mention why you are requesting the change of your registered email ID.
Below is the official step-by-step procedure to update your email address on the Online OCI Services portal:
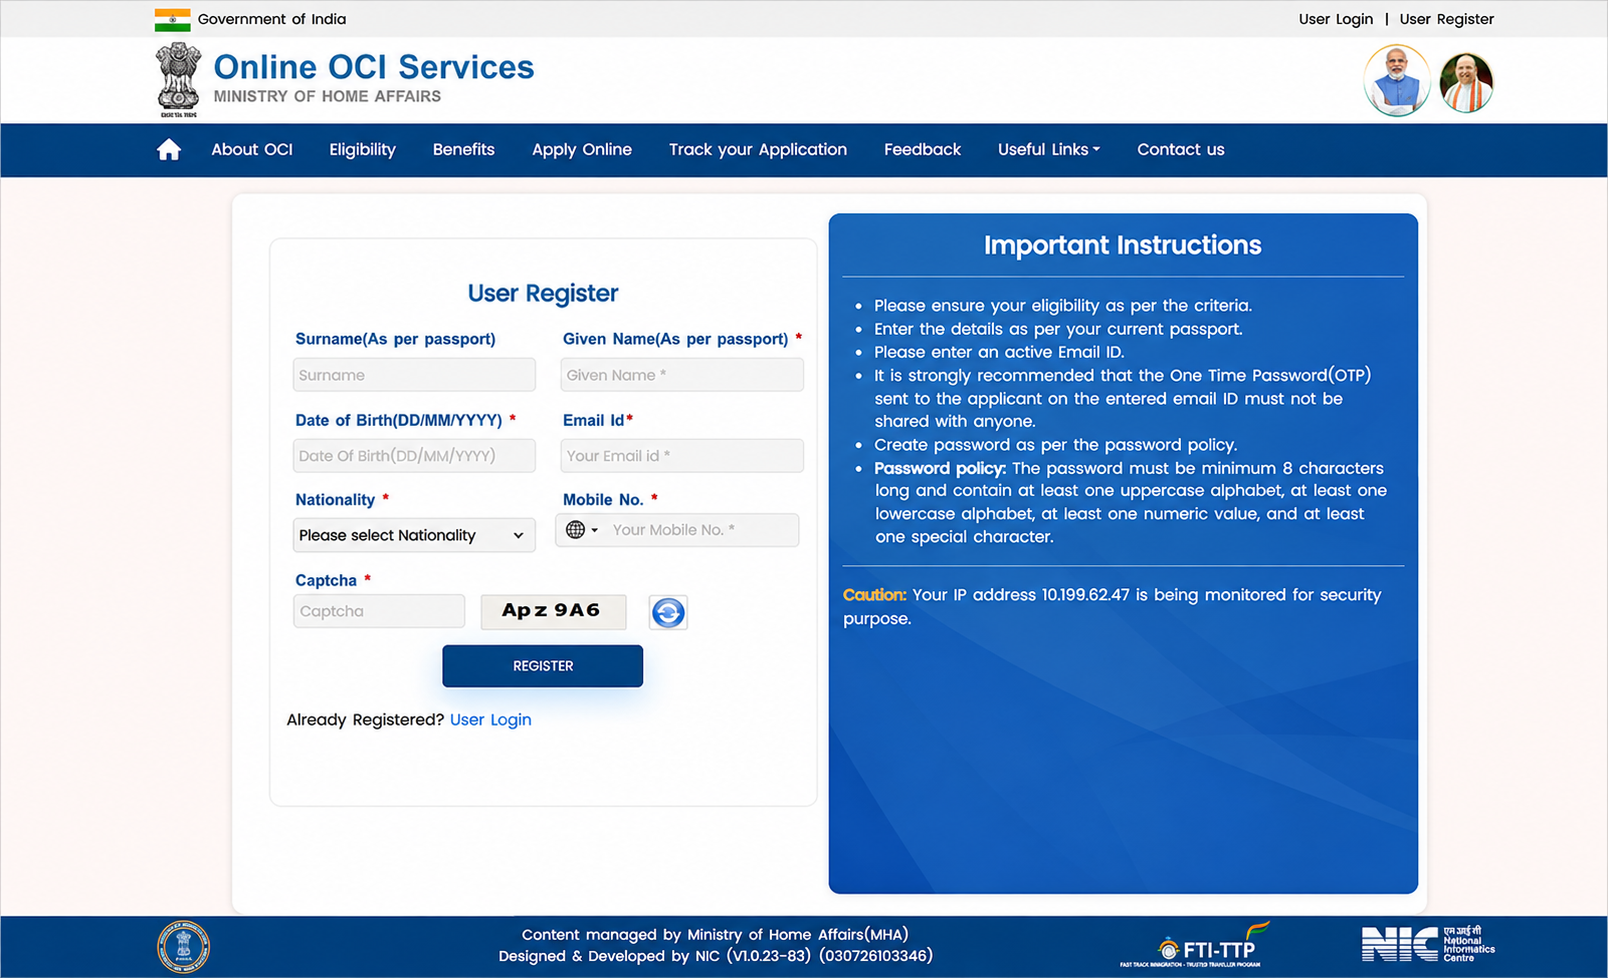
Visit the official Online OCI Services portal and click on the "User Register" option on the top navigation bar. Fill in your basic details—such as Given Name, Surname, Date of Birth, Passport Number, and your new active Email ID—and complete the security captcha to register.
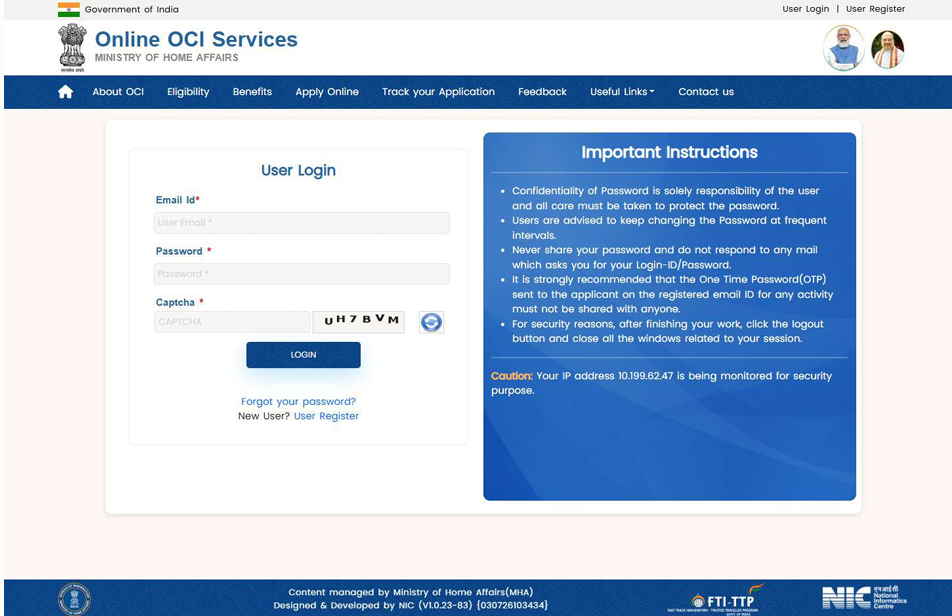
Once registered successfully, go to the "User Login" section. Enter your newly registered Email ID, Password, and Captcha code to log in to your account dashboard.
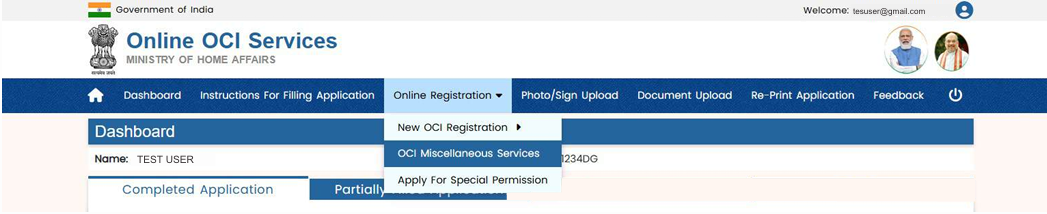
On your main user dashboard, navigate through the options and select "OCI Miscellaneous Services" to begin the information update process.
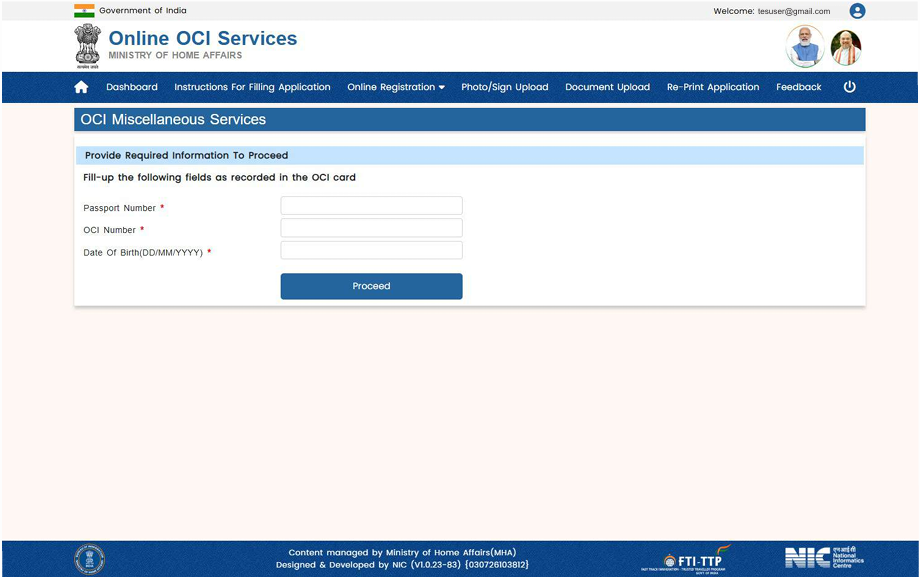
Enter your existing OCI details as recorded on your card. You will need to provide your Passport Number, OCI Number, and Date of Birth (DD/MM/YYYY), then click Proceed.
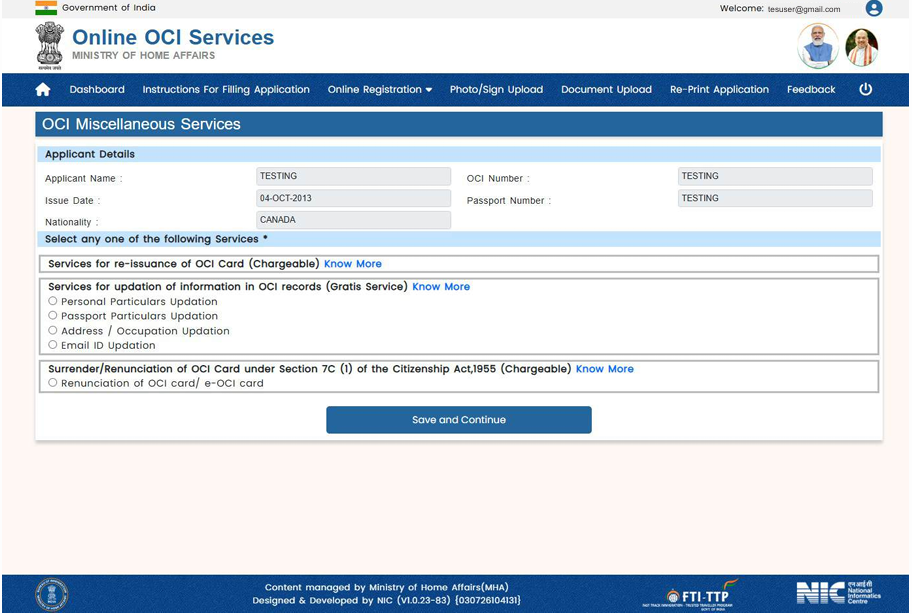
Under the gratis (free of charge) updates section, you will see multiple update options. Select "Email ID Updation" from the list and click Save and Continue.
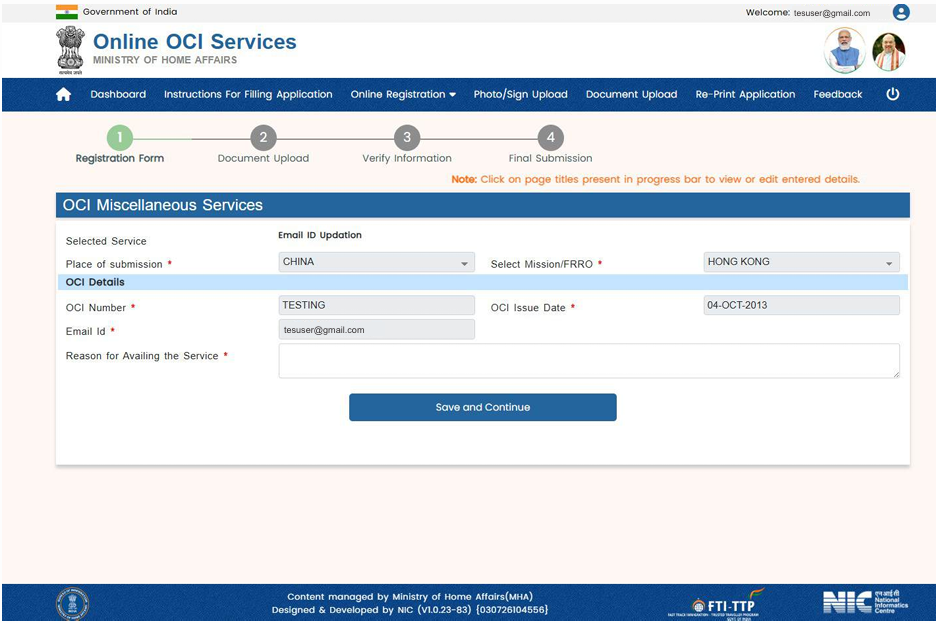
Select your submission location (Country and Mission/FRRO), review your displayed OCI issue details, enter your new email address, and provide a brief reason for availing the service (e.g., changing to a new primary email account).
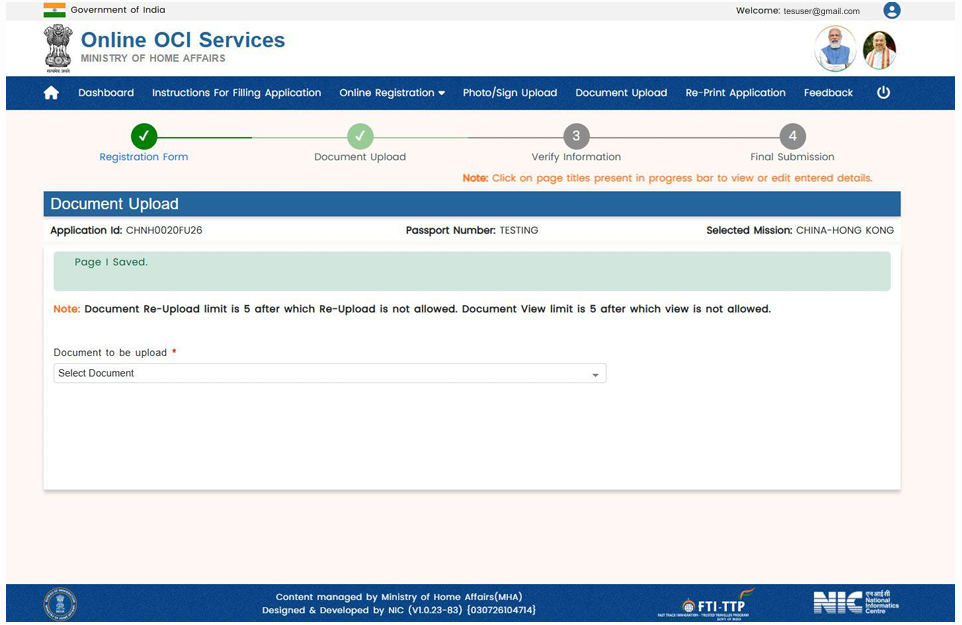
Proceed to the document upload page and upload a clear scanned copy of your OCI card as requested by the system. Make sure the file meets the portal's size and format guidelines.
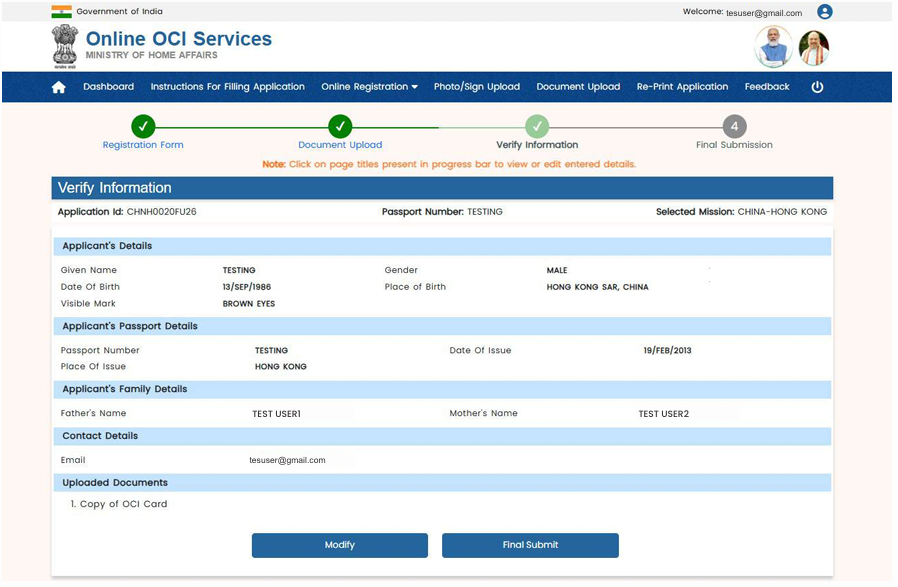
Carefully review all the displayed information—including your personal details, passport details, family contact details, and uploaded documents to check If everything is accurate and correct. Once everything is checked, click Final Submit.
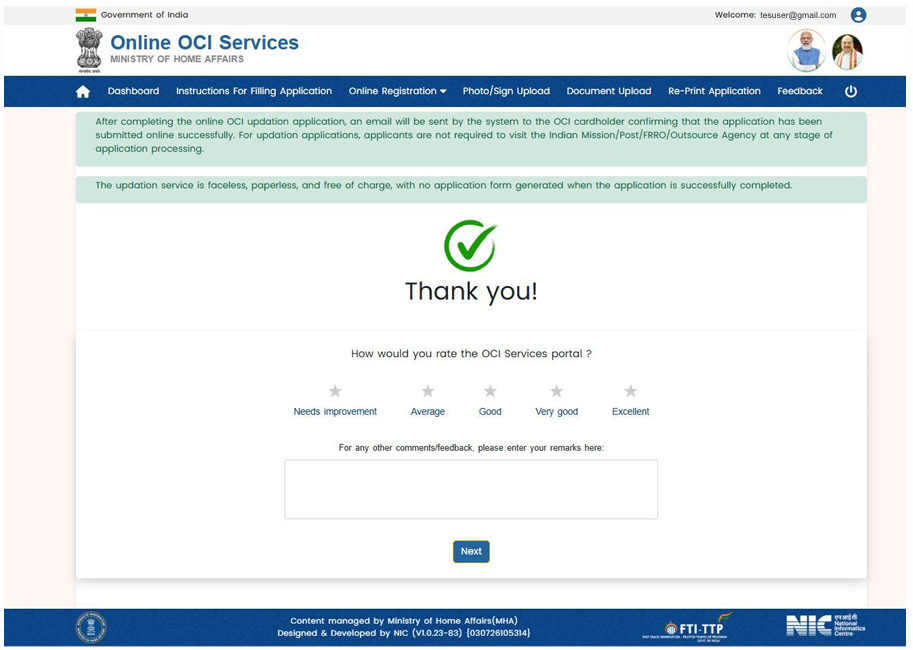
After submission, you will see a “Thank you” page. The system also sends a confirmation email to the cardholder saying the application was submitted successfully. The service is faceless and paperless, and no application form is generated. Once the competent authority approves the request, your new email ID is updated in the OCI records.
Updating your registered email ID, correcting OCI details, or managing other OCI-related changes? Get professional guidance to make your OCI application process easier and hassle-free.
GET OCI APPLICATION ASSISTANCE →Expert Guidance for Your OCI Documentation & Updates
Keep the following points in mind while completing your OCI Email ID Updation application:
Captcha and Login Session: Enter the Captcha correctly during registration and login. If the session expires, you’ll need to login again and enter the new-captcha.
Follow Document Upload Guidelines: Upload a clear scanned copy of your OCI Card. Follow the file format, size, and upload instructions displayed on the portal.
Use an Active Email Address: When you’re updating your email, make sure to update with the new mail ID which is functional and accessible. Double-check the spelling before actually updating.
Verify Details Before Final Submission: Check your OCI number, passport number, date of birth, and new email address carefully.
Keep Login Credentials Secure: Never share your OCI portal password, OTP, or other confidential login information with anyone.
Wait for Approval: Submitting the application does not mean your email address has been updated. The request must be approved by the competent authority first.
Updating your registered email address is an important step in maintaining access to your OCI Card services. If your old email account is no longer active or you cannot access the email ID linked to your OCI Card, the Email ID Updation facility allows you to submit a request online through the OCI Miscellaneous Services portal.
As explained in this guide, the process involves 9 simple steps —starting with user registration and login, followed by selecting OCI Miscellaneous Services, entering your OCI details, choosing Email ID Updation, uploading your OCI Card copy, and finally submitting the application for approval.
Remember that this service is available under Gratis Services, so there is no application fee. However, your new email address will become linked to your OCI records only after approval by the competent authority.
Once approved, you can use the updated email address to access the OCI portal and download your e-OCI Card. Make sure you use an active email address and carefully verify all information before submitting your application to avoid unnecessary delays.
Note: This guide is for information purposes only. HelpOCI or the author will not be responsible for any direct or indirect loss incurred by the reader for taking any decision based on the information or the contents. It is advisable to consult a qualified professional for guidance based on your exact situation.
Anil is an NRI documentation and immigration specialist at HelpOCI, a trusted platform dedicated to simplifying OCI, PAN, Visa, Passport, and NRI-related services for applicants worldwide. With extensive expertise in Indian consular services, overseas documentation, OCI applications, PAN card services, visa assistance, passport renewals, and NRI compliance, Anil is committed to making complex government procedures easier to understand and navigate. By combining in-depth research with official government guidelines, Anil creates practical, accurate, and easy-to-follow resources that help applicants complete their documentation confidently and efficiently See Full Bio
Get reliable support for every step, whether it's form filling or final submission.




Want to read more? Explore Blogs
Comments